After a storm, safety should be your top priority. Rushing into cleanup can be dangerous, especially with unstable branches, leaning trees, or downed power lines. Here’s a quick breakdown of the most important steps:
- Stay Safe First: Inspect from a distance, avoid power lines, and watch for hanging branches ("widow-makers").
- Gear Up: Use protective equipment like hard hats, gloves, and boots to prevent injuries.
- Clear Debris Carefully: Start with small branches and leaves, and only tackle larger tasks if it’s safe.
- Assess Tree Damage: Use the "50% Rule" – if over half the canopy is damaged, the tree may not recover.
- Document Everything: Photos and receipts are critical for insurance claims.
- Dispose Responsibly: Follow local waste guidelines and consider composting organic debris.
- Call Professionals When Needed: For dangerous tasks like removing large branches or trees, hire certified arborists.
Storm cleanup is challenging, but following these steps ensures you stay safe while protecting your property.
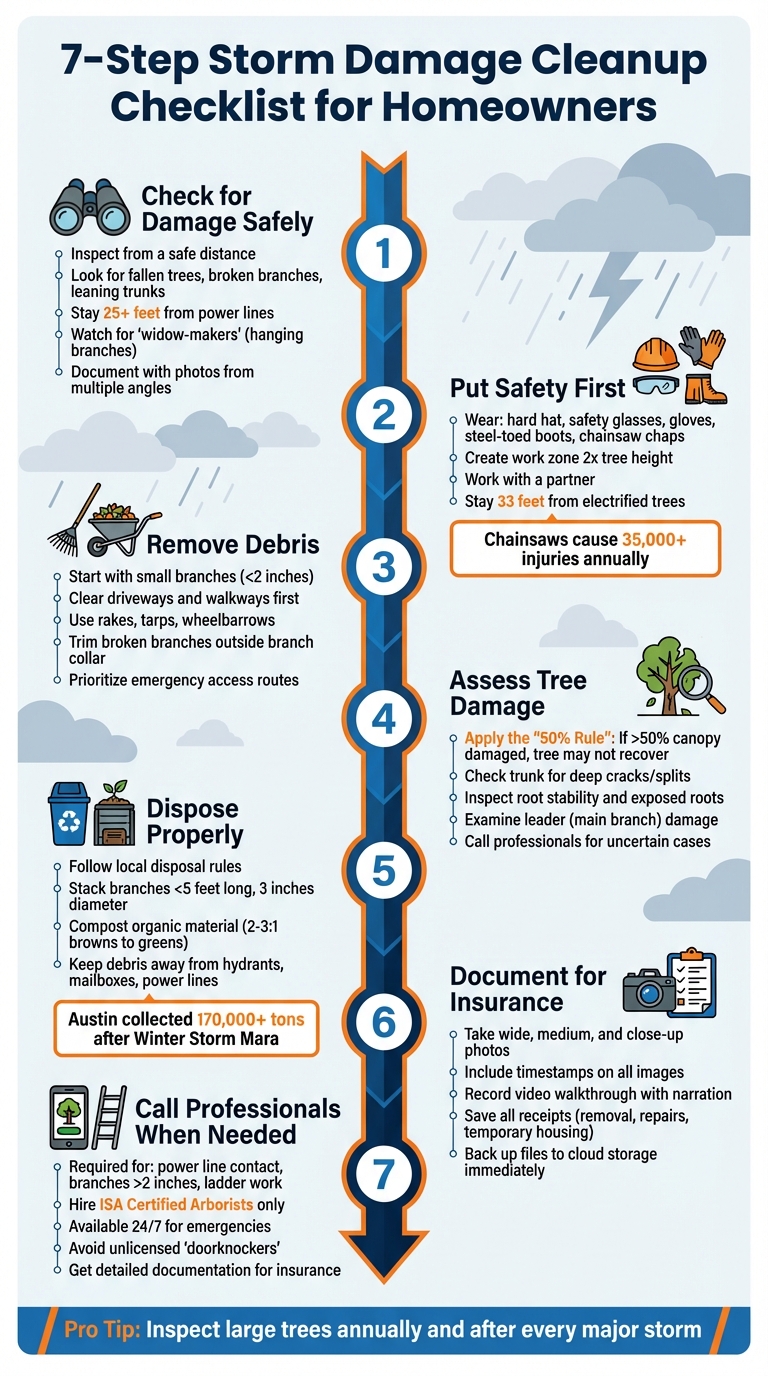
7-Step Storm Damage Cleanup Checklist for Homeowners
Step 1: Check for Damage Without Putting Yourself at Risk
Look Over Your Property for Obvious Damage
Start by inspecting your property from a safe distance. Use binoculars or a flashlight if visibility is low, and only approach areas when it’s completely safe to do so. Focus on three key areas of the tree: the crown (branches and leaves), the trunk (main stem), and the roots (base and surrounding soil). Look for signs like fallen trees, broken branches, leaning trunks, or damage to nearby structures like buildings, fences, or power lines.
Pay extra attention to trees near high-traffic areas like driveways and sidewalks, as they pose a greater risk compared to those in remote spots. For example, a tree leaning over a busy driveway could become a hazard if it’s unstable. Arnold "Beau" Brodbeck and Jack Rowe from the Alabama Cooperative Extension System emphasize:
"Large trees should be inspected once a year or after every major storm".
Once you’ve identified visible damage, your next step is to spot any immediate dangers.
Spot Dangerous Conditions
Be cautious around branches in contact with power lines. Even low-voltage wires can be extremely dangerous – stay at least 25 feet away and contact your utility company right away if you encounter downed lines. Also, look for "widow-makers", which are large, loose branches hanging precariously in the canopy. Hallie Dozier from the LSU AgCenter stresses:
"A branch as small as a baseball bat can kill you!".
Check for signs of root instability, such as soil cracks, lifted root plates, or mounding opposite a tree’s lean, which might indicate root failure. Twisted or bent branches caught under debris are another red flag – they’re under immense tension and can be unpredictable. The MU Extension warns:
"usually under tremendous strain that is undetectable to the untrained eye".
Severe structural issues, like deep vertical or horizontal cracks in the trunk, should also raise concern. After identifying these hazards, it’s crucial to document everything carefully.
Record the Damage
Take photos of the damage from multiple angles. Capture close-ups of cracks, broken limbs, exposed roots, and any other issues you observe. Use a notepad to jot down details about each damaged tree, including its location, the extent of crown damage, and whether it poses a threat to nearby structures. For trunk cracks, measure their depth and length with a yardstick – longer and deeper cracks often indicate greater risk. Mark hazardous areas for further evaluation by professionals. Keeping this documentation organized will be essential for insurance claims and consultations with certified arborists.
sbb-itb-a61c528
Storm Damage in Trees: Hidden Dangers, Cleanup, and Planting for the Future
Step 2: Put Safety First During Cleanup
The aftermath of a storm is often more hazardous than the storm itself. Arnold "Beau" Brodbeck from the Alabama Cooperative Extension System highlights this sobering fact:
"More people are hurt and killed in the days and weeks after storm events than during the storms themselves".
The rush to clean up can lead to serious injuries if you aren’t careful. Taking the right precautions can mean the difference between a smooth recovery and a trip to the emergency room. Here’s how to stay safe while tackling post-storm cleanup.
Use the Right Protective Equipment
Before anything else, gear up properly. The right equipment shields you from common hazards during cleanup. Start with head protection – a hard hat or helmet can prevent injuries from falling branches or chainsaw kickbacks. Protect your eyes with safety glasses, goggles, or a face shield to block flying debris and wood chips. Since power tools like chainsaws are loud, wear earmuffs or earplugs to protect your hearing.
For your hands, heavy-duty gloves are a must to avoid cuts, splinters, and abrasions. If you’re using a chainsaw, invest in chainsaw chaps – these can reduce the severity of injuries by up to 40%. On your feet, wear heavy work boots, ideally steel-toed, to prevent crushing injuries and cuts. Chainsaws alone cause over 35,000 injuries annually, with more than 80% of emergency visits involving lacerations. On average, each chainsaw injury requires over 110 stitches.
Create a Safe Work Zone
Once you’re equipped, set up a secure work area. Mark off a perimeter at least twice the height of the tree you’re working on using bright tape or cones. This keeps children, pets, and others out of harm’s way. Always work with a partner who can assist in emergencies, provide first aid, or act as a lookout if you’re near a road.
Stay at least 33 feet away from trees touching power lines – both the tree and the surrounding ground can be electrified. Remove brush and debris that could trip you up. Keep the exact address of your worksite handy so emergency services can find you quickly if needed.
Don’t Push Yourself Too Hard
Storm cleanup is physically demanding, and overexertion can lead to mistakes. Avoid lifting anything over 50 pounds, and always lift with your legs, not your back. Take frequent breaks to stay sharp and avoid fatigue. If you’re cutting debris on the ground, kneel instead of bending over to protect your back. Exhaustion slows your reaction time, which is especially risky when dealing with branches under tension – they can snap back unexpectedly. Know your limits and don’t hesitate to call in professionals for tasks beyond your ability.
Step 3: Remove Debris and Open Up Access Routes
Once you’ve established a safe work zone, it’s time to carefully start removing debris. Clearing driveways, walkways, and streets is essential to ensure emergency access and allow for smoother recovery efforts. As the Real Tree Team explains:
"Restoration of these routes facilitates quicker aid and recovery".
Start with smaller debris to create a safer environment and improve access.
Pick Up Small Branches and Leaves
Begin by tackling smaller debris like twigs, leaves, and branches under 2 inches in diameter. Tools such as rakes, tarps, and wheelbarrows can help you gather these items efficiently. While they might seem insignificant, this debris can create tripping hazards and slow down the drying process of the ground. Rake the debris into piles on a tarp, then transport it to a designated area for disposal or composting. For any broken branches still attached to trees, use pruning shears to trim them just outside the branch collar to promote proper tree healing.
Take safety precautions by wearing goggles, gloves, and sturdy boots to protect yourself from hidden dangers like glass, nails, or sharp metal buried in the debris. Be especially cautious with branches under tension. Gabrielle Harden, Forestry Extension Educator at Utah State University, advises:
"damaged branches that are bent and under tension or compression could shift or break and be thrown or fall as you are cutting them, resulting in injury".
Once the smaller debris is cleared, you can focus on reopening critical pathways.
Clear Driveways and Walkways
Clearing high-traffic areas like driveways, roads, and walkways should be a top priority. Remove any fallen trees or large branches blocking these routes. If a small tree or shrub is leaning across a pathway, you can straighten it by using metal or hardwood stakes. Place the stakes at an angle away from the trunk and secure them with wide straps or cloth to avoid damaging the bark. For exposed roots near walkways, cover them immediately with soil or moist burlap to prevent them from drying out.
Take extra care when working near utility lines. If you find debris in contact with a power line, maintain a safe distance of at least 33 feet and notify your utility company immediately.
Step 4: Check Trees and Handle Damage
Once access routes are clear, it’s time to assess tree damage up close. This step helps you figure out which trees might recover and which could pose safety risks.
Evaluate Tree Damage
Start with the 50% Rule: if more than half the canopy is damaged, the tree’s chances of recovery are slim. Gabrielle Harden, Forestry Extension Educator at Utah State University, explains:
"If 50% or more of the tree’s canopy is undamaged, it should recover"
Next, inspect the trunk for deep splits or cracks – these often signal structural weakness that can’t be fixed. Check root stability by looking for exposed roots or mounding soil near the base, which may mean the tree is unstable and at risk of falling. Examine the leader (the main upward-growing branch), as damage here can affect the tree’s long-term form. Finally, assess the size of wounds where branches have broken off. Breaks larger than 2 to 3 inches on a 12-inch diameter limb are less likely to heal properly, leaving the tree vulnerable to pests and decay.
Once you’ve completed your assessment, it’s time to address damaged branches.
Prune Damaged Branches
For branches within reach, use the right tools: hand shears for branches up to 1/4 inch thick, loppers for those up to 1.5 inches, and a pruning saw for anything larger. Always make cuts just outside the "branch collar" – the slightly swollen area where the branch connects to the trunk – to help the tree heal naturally. Avoid leaving stubs, as they can attract disease and decay. Skip wound dressings or pruning paints, as these can disrupt the tree’s natural healing process.
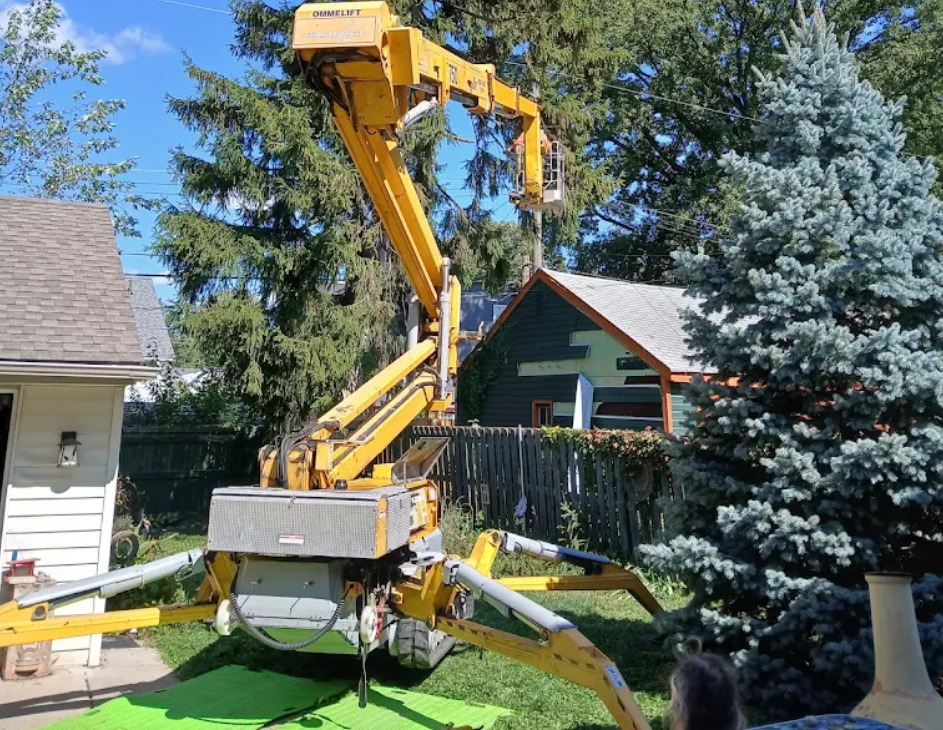
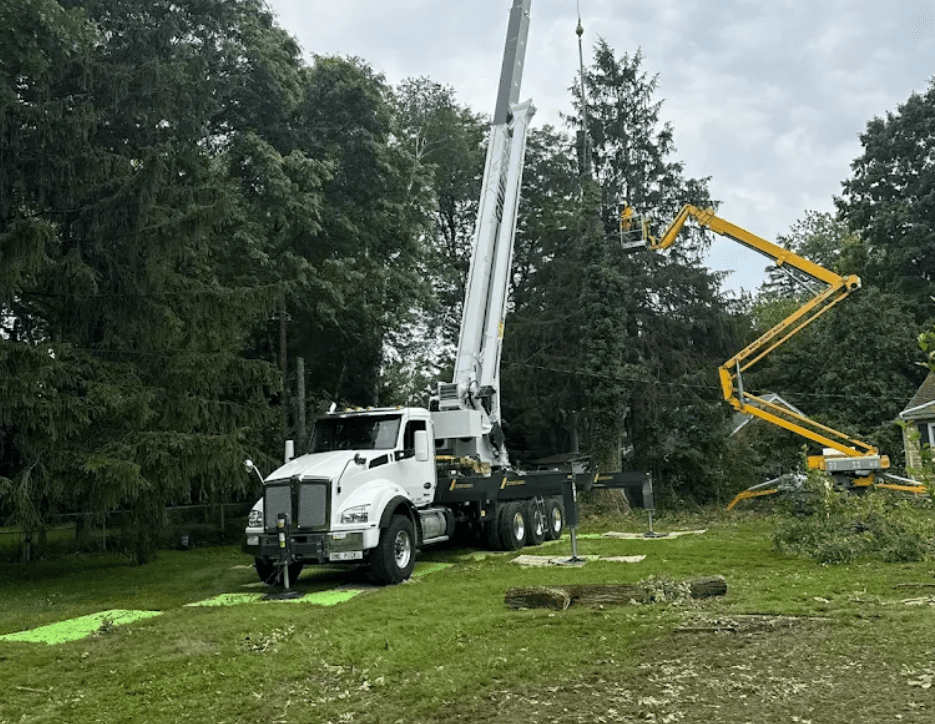
If the job requires a chainsaw, ladder, or climbing, it’s safer to hire a professional.
When pruning isn’t enough to stabilize the tree, removal might be necessary.
Know When a Tree Can’t Be Saved
Some damage is beyond repair. A split trunk or a rotten core means the tree is unsalvageable. The Arbor Day Foundation emphasizes:
"Some trees simply can’t be saved or are not worth saving. If the tree has already been weakened by disease, if the trunk is split, or more than 50 percent of the crown is gone, the tree has lost its survival edge"
Trees that lean significantly, especially with mounded soil on the opposite side, often indicate critical root failure and usually need to be removed. However, if the tree doesn’t pose an immediate threat to people or property, you can wait a few weeks or months to see if it begins to recover. For borderline cases, consulting an ISA Certified Arborist is the best way to determine the safest and most practical course of action.
Step 5: Get Rid of Storm Debris the Right Way
Clearing storm debris isn’t just about tidying up – it’s about doing it safely and responsibly. Proper disposal helps prevent hazards and ensures you’re following local guidelines.
Follow Your Local Disposal Rules
Every municipality has its own rules for debris removal, so it’s important to know what’s required in your area. Most places ask that debris be sorted into categories like vegetative waste, construction materials, and hazardous items. Stick to these guidelines when placing debris at the curb:
- Keep debris clear of hydrants, meters, mailboxes, power lines, and utility boxes.
- Stack branches loosely in a single row with cut ends facing the street. Branches are usually required to be under 5 feet long and 3 inches in diameter for pickup.
- If discarding refrigerators or freezers, secure the doors with duct tape to prevent accidents.
Reach out to your local waste provider to confirm collection schedules. Some cities offer special storm debris pickups, while others may require you to request the service. For instance, Austin Resource Recovery collected over 5,600 tons of debris after a microburst in May 2025, with thousands of residents taking advantage of free drop-offs at the Hornsby Bend Biosolids Management Plant. During Winter Storm Mara in 2023, Austin managed to collect more than 170,000 tons of storm debris.
Also, avoid burning storm debris. Burning structural materials can release harmful fumes and often requires permits.
Once your debris is sorted and ready for pickup, consider turning organic waste into something useful – compost!
Compost Organic Material
Storm debris like leaves and small branches can be a goldmine for composting. Composting not only reduces waste but also revitalizes your garden. Dry leaves and twigs are "browns" (carbon-rich materials) that balance well with "greens" like grass clippings or food scraps. Aim for a 2–3:1 ratio of browns to greens for the best results.
Here’s how to get started:
- Chop or shred branches into smaller pieces to speed up decomposition.
- Begin your compost pile with a 4–6-inch layer of twigs or wood chips to improve airflow and moisture retention.
- Keep the pile moist – think of the texture of a wrung-out sponge – and turn it occasionally with a garden fork to help it break down evenly.
When properly maintained, your compost pile can reach temperatures of 130° to 160°F, breaking down into nutrient-rich compost in just 3 to 5 months.
For medium-sized branches, a woodchipper can be handy. Use it to create wood chips that make excellent mulch. Spread the chips 2 to 3 inches deep around trees, but keep them a few inches away from the trunk to prevent rot. Just remember to avoid composting diseased or pest-infested plant material, as backyard compost piles may not get hot enough to eliminate pathogens.
Step 6: Record Damage for Your Insurance Claim
Once you’ve cleared debris and addressed immediate hazards, it’s time to document everything thoroughly for your insurance claim.
Detailed records are your best ally when it comes to getting a fair settlement. The goal is to capture the full extent of the damage before you start cleaning up or making temporary repairs. Once items are removed or fixed, proving the original condition becomes much harder.
"Keeping an accurate record of any and all storm damage can prove vital in securing a fair settlement on your claim from your insurance company." – Insurance Claim HQ
Start documenting as soon as it’s safe. Waiting too long increases the risk of forgetting details or missing signs of damage that could worsen over time. If new issues appear – like spreading water stains or cracks – note the date you discovered them. Timely and detailed documentation not only strengthens your claim but also supports the safety steps you’ve already taken.
Take Photos of All Damaged Areas
Photos are one of the most effective tools for documenting storm damage. Use a mix of wide-angle, medium, and close-up shots to cover all the bases. Start with wide shots to show the overall scene, like a yard full of debris or a damaged roof. Then, move closer for medium shots of specific areas, such as a broken window or damaged tree. Finally, take close-ups to capture finer details like cracks, dents, or splintered wood.
Make sure every photo includes a timestamp. Document everything – damaged buildings, personal property, and even trees (note the species, size, and location). If you’re planning to remove a tree stump, measure and photograph its diameter before grinding it down.
In addition to photos, record a video walkthrough while narrating what you see. Videos can provide context that still images might miss. Avoid cleaning up or rearranging anything before taking these recordings. Once done, immediately back up your files to a cloud service like Google Drive or iCloud to safeguard your evidence in case your device is lost or damaged. A thorough visual record now can save you from disputes later.
Save All Cleanup and Repair Receipts
Keep every receipt tied to your recovery efforts. This includes costs for emergency tarping, tree removal, stump grinding, temporary housing, meals, and repair supplies. These expenses can add up quickly, and having a solid paper trail increases the chances that your insurance company will reimburse you. These records are critical for both your immediate repairs and long-term recovery.
Use a dedicated notebook to log damages, repairs, and all communications with your insurer. Date each entry and include detailed descriptions of damaged items, such as their make, model, age, and original purchase price. For professional services like tree removal, save both the initial estimate and the final invoice. If you need to stay elsewhere during repairs, keep receipts for hotels and meals to document your additional living expenses.
Staying organized strengthens your case. As attorney Meagan Tate from Lawrence & Associates Accident and Injury Lawyers, LLC explains:
"I did not understand how emotionally exhausting a property and casualty claim could be or how greatly an insurance company could and would undervalue a claim until the roof of my own home was damaged by a storm."
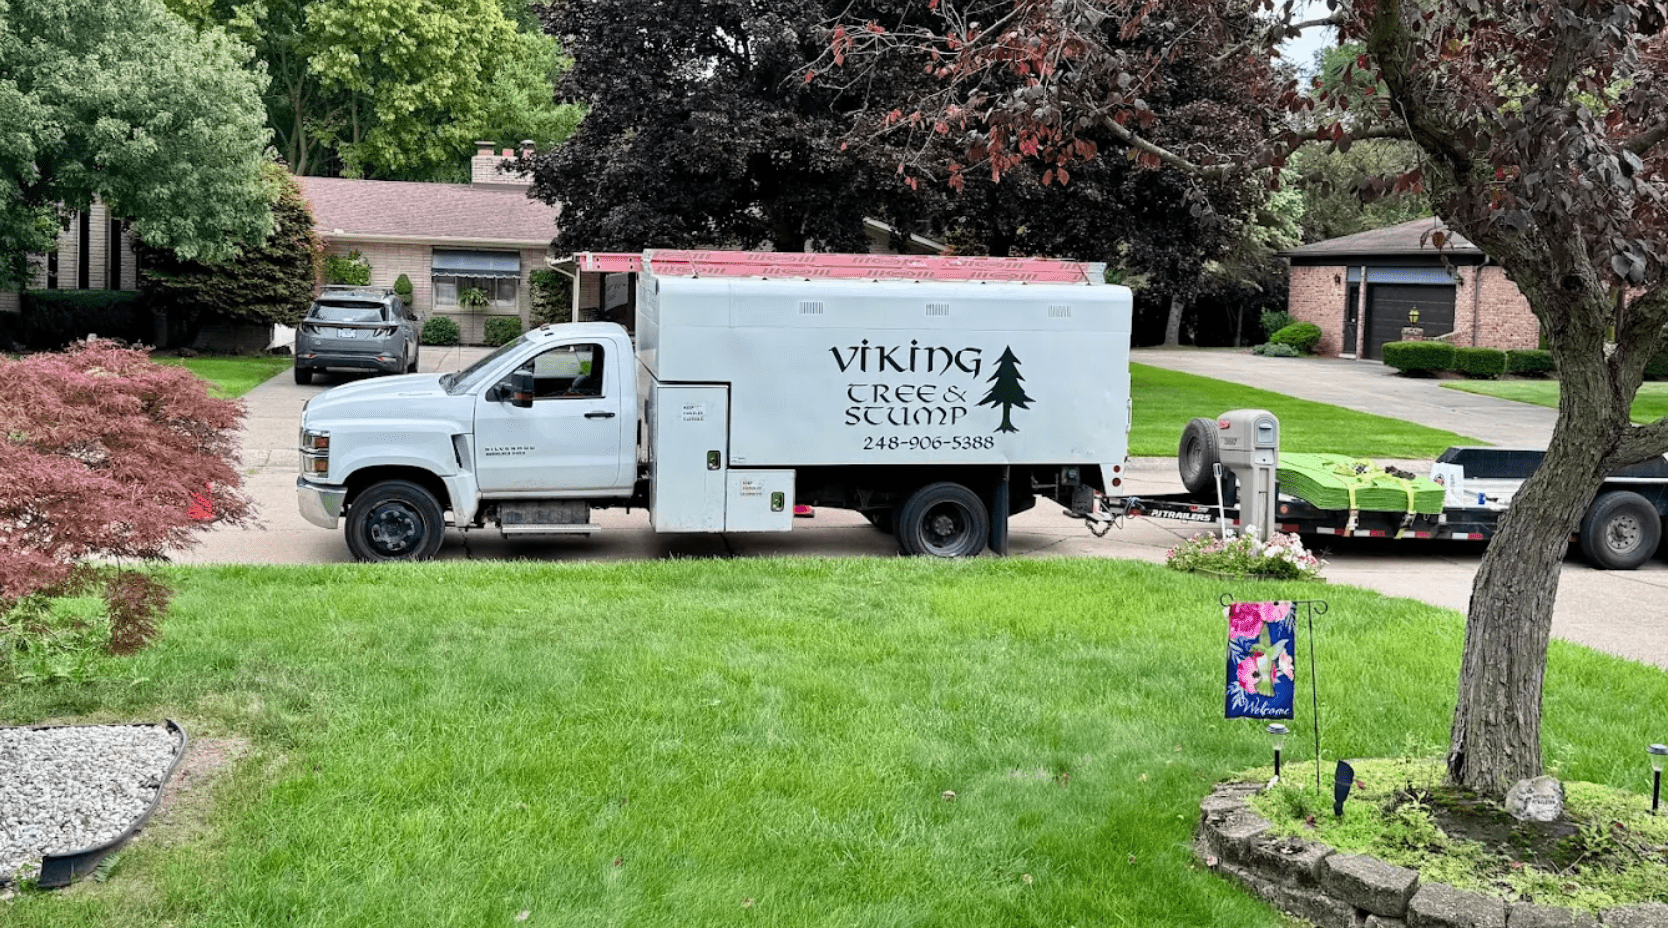
Step 7: Call Viking Tree & Stump for Help When Needed
Sometimes storm damage is simply too risky or complex to handle on your own. That’s when calling in the professionals is not just smart – it’s essential. Knowing your limits can help prevent injuries and avoid further damage to your property.
Call Certified Arborists for Hazardous Tasks
If you’re dealing with trees or branches that have come into contact with power lines, are leaning on your home, or are otherwise unstable, it’s time to call a certified arborist. Professionals are also necessary for handling branches over 2 inches in diameter or situations that require using a ladder.
Large hanging branches – often referred to as "widow-makers" – are especially dangerous. These can fall without warning and require specialized tools and training to remove safely. As outlined in Step 4, trees with split trunks, exposed root systems, or significant crown loss (more than 50%) typically need expert intervention.
Viking Tree & Stump’s Michigan-certified arborists are highly experienced in managing hazardous removals, even in challenging urban environments. They also provide the detailed documentation often required for storm-related insurance claims [41, 42]. Be cautious of "doorknockers" who show up after storms offering services – they may lack the necessary insurance or certifications [1, 43].
For immediate hazards, Viking Tree & Stump’s certified team is available around the clock.
24/7 Emergency Services in Oakland and Macomb Counties
Viking Tree & Stump offers 24/7 emergency services for urgent situations in Oakland and Macomb Counties.
"After a severe storm damaged several trees on our property, Viking’s emergency response team was there within hours. Their expertise and quick action prevented further damage to our home. Excellent service!"
– Sarah M., Property Manager
Once the immediate dangers are addressed, their team ensures that any lingering risks are taken care of promptly. With over 350 5-star reviews, Viking Tree & Stump has earned a reputation for professional service, clear pricing, and thorough cleanup after even the most complex jobs. Their specialized equipment is tailored for Detroit’s urban settings, allowing them to protect your landscape while removing trees or clearing debris. Whether you need emergency tree removal, stump grinding, or help with hazardous cleanup, their certified team has the tools and experience to handle it safely and efficiently.
Conclusion
Recovering from a storm can feel overwhelming, but having a clear plan makes the process more manageable. The checklist above emphasizes starting with safety first – keep your distance from power lines, assess hazardous conditions, and document any damage for insurance purposes.
For smaller debris, tackle what you can safely handle. Larger branches, fallen trees, or anything involving power lines or ladders should always be left to certified professionals. The guidelines provided outline when expert help is essential to ensure safety and proper cleanup.
One of the best ways to prepare for future storms is by keeping your trees healthy year-round. Regular tree inspections, applying mulch, deep watering during dry spells, and annual professional evaluations can strengthen trees against harsh weather. As Arnold "Beau" Brodbeck, Extension Specialist at Auburn University, advises:
"Large trees should be inspected once a year or after every major storm".
If you’re uncertain about a situation, consult certified arborists. They have the training and tools to handle dangerous or complex scenarios. By following these steps and taking proactive care of your trees, you’ll be in a stronger position to face whatever nature throws your way.
FAQs
What is the safest way to check for tree damage after a storm?
After a storm, your first concern should be safety when evaluating tree damage. Begin by observing from a safe distance to identify any immediate hazards, such as fallen power lines or trees tangled with electrical wires. If you see these risks, contact your utility company immediately and stay clear of the area.
Take a closer look at the tree for signs of serious damage. Watch for large cracks, splits, leaning trunks, uprooted trees, or broken branches that could fall. Avoid standing directly beneath damaged sections or climbing the tree, as unstable limbs or debris could be dangerous. If a tree is leaning significantly or has lost more than half of its crown, it’s a good idea to call a professional arborist for a thorough assessment.
To protect yourself during the inspection, wear proper safety gear, including gloves, a helmet, and eye protection. These precautions will help minimize risks while you check the condition of your trees.
What safety gear do I need for storm cleanup?
When cleaning up after a storm, having the right safety gear is crucial to avoid injuries from debris and damaged trees. Essential items include sturdy gloves to protect your hands, safety goggles or other eye protection to guard against flying debris, and durable, close-toed shoes to shield your feet from sharp objects and uneven terrain.
If you’re dealing with fallen branches or using tools like chainsaws, a helmet can help protect you from falling limbs, and hearing protection can reduce the risk of noise-related damage. Wear tough, fitted clothing that can handle cuts and scrapes but won’t get caught in equipment. Prioritizing safety is key when tackling storm cleanup.
When should I contact a professional for tree removal after a storm?
If a tree stands over 20 feet tall, shows considerable damage near power lines, or seems unstable, it’s best to call a professional. These situations can be dangerous, especially with larger trees that might cause serious harm or property damage if not handled correctly.
Also, if you’re uncertain about the tree’s condition or don’t have the right tools and skills, bringing in an expert ensures the work is done safely and effectively. When dealing with storm-damaged trees, safety should always come first.